
Sunday, October 31, 2010
Mickey Mouse Part Two
Here's the finished product after decoration. Not quite as nice as I had hoped, but that's the point of a practice run!

Saturday, October 30, 2010
Mickey Mouse Cake Part 1


When I was younger, I didn't really love Mickey Mouse. I don't think I understood why he never wore a shirt, even when it was cold outside, and his laugh...seriously, what's up with his laugh? Anyway, I am making a Mickey Mouse cake for a baby shower (would've been nice if she wanted the Hungry Caterpillar). This is a trial run. I have never made a two-tiered cake before, so I figured that practice would be good. Necessary in fact. I'll be bringing the cake into work on Monday to show the recipient, see if she likes it. I was originally going to do Mickey Mouse head and then have ears being cupcakes (she wants some cupcakes), but the idea of trying to draw a face was a bit too much for me. So, two-tier cake it is (about 35 people need to be fed). I am also going to be making probably a dozen cupcakes with some cut outs that will match the cake. Coordination...I'm on top of things.
Today didn't exactly go as planned. Got up, ran a ton of errands, met with a friend for lunch, then car started smoking. Never good. Turns out I have a cracked reservoir tank. Awesome. Part should be in hopefully on Monday. Until then, I just hope my engine doesn't decide to blow...sadly a real possibility at this point. By the time I got the car looked at and home from the grocery store, it was about 4:00. Threw in some laundry (discovering after I put my money in that the dryers in my building don't work this week....had to bring over wet laundry to the next building over) and got started on baking. Below is pretty much what I've been working on since about that time...So, about five hours later and I can kick my feet up. Decorating comes tomorrow.
I prepared the fondant yesterday (see the caterpillar entry for recipe). Today, I used black and red coloring, while setting aside some to not be colored. (That part will be painted silver later.)
Using the black fondant, I cut out circles for ears and heads, and then also shaped 3-D mickey mouse heads.
Yellow Cake
7 1/2 cups all purpose flour
1 tablespoon and 1 1/2 teaspoons baking powder
1 tablespoon and 1 1/2 teaspoons baking powder
1 tablespoon and 2 teaspoons baking soda
2 cups butter
5 cups white sugar
6 eggs
1 tablespoon vanilla extract
5 cups buttermilk**
**If you don't have buttermilk (and don't feel like paying lots for it), take regular milk and squeeze in some fresh lemon juice. (About a teaspoon for every cup) Let sit for ten minutes and then you have buttermilk!
Sift in a medium sized bowl the flour, baking powder, and baking soda. Set aside.
Then in a large bowl, using an electric mixer, cream the butter and sugar together. Add vanilla. Then beat in one egg at a time.
Add some flour mixture to the egg mixture. Then add some buttermilk. Then the flour...and so on.
Then in greased 9 inch cake pans, add the mixture. Do the same for the six inch cake pans. Bake for about 30 minutes at 350 degrees. When you remove the cakes from the oven, place cakes on a cooling rack. You'll want to put the cakes in the fridge when cool.
This will make 3 9-inch layers, and 2 6-inch layers.
Strawberry Filling
1 package of fresh strawberries
2 tablespoons honey
1 teaspoon lemon
Remove the stems from the strawberries and put in a food processor. Roughly chop, but do not liquefy. Then place in a small bowl. Add honey and lemon. Mix well. Set in fridge until ready to use.
Next steps!
Remove the chilled cakes from the fridge. Using a very sharp knife, level each layer (both the 9-inch and 6-inch cakes). Looking at the 9-inch layers, choose a base layer. Using buttercream frosting, put a thin layer on the top. Then using a piping bag, build a "wall" of icing around the edges. This will prevent the filling from oozing out through the sides. Add several spoonfulls of strawberry filling on top of the icing, within your "walls".
Then take the next layer and place it on top of your base layer. Do the same thing with the icing and filling. Take your third and last layer and place it on top. Using a thin layer of buttercream frosting, ice the sides and top, taking care to make the sides as even as possible. (Fill in any gaps with the icing.)
Do the same thing for your two 6-inch cakes, but do NOT place them on top of the 9-inch cake yet.
Even more steps!
Since it's a two-tiered cake, it is important to make sure that your bottom tier can support the top tier. Safest bet is to use dowels. You can find these at any craft store or hardware store. They don't need to be too large in diameter since it's only two tier. Mine was about 3-4 mm.
Measure the dowel next to the 9-inch cake and make a mark at the top of the cake on the dowel. Cut the dowel to this length. Do this to make five total dowels. Roughly measure on the 9-inch cake where the top tier will go (I used the pan I originally baked with). This gives you an estimate of where the dowels should be placed.
Insert one dowel in the middle of the cake. Then arrange the other four in a rough circle around it (closer to the edges of where the top tier will sit).
Put all the cakes back in the fridge until later.
Friday, October 29, 2010
Wine and Chocolate
One of my jobs (among others) is a college professor in public health. Scary thought isn't it? I influence young minds... Awesome. Anyway, so last night was Wine and Chocolate night in one of my classes. (All over 21, mind you.) Last year, we had gone to Whole Foods. There's a second floor that has a wine bar (best Whole Foods ever!). They had hosted us, did a "whole" (hehe) wine and chocolate history/culture lesson and tasting. (I teach the best classes ever!!!) This year, a few days ago, I get such a lovely email from them saying that they can't host my class because the wine bar be open for business. Could we do it at 3 instead? Considering my class starts at 7:20 and almost every single one of my students work, that wouldn't be able to happen. Even I wouldn't have been able to get out of job #1 to get to class on time. I ended up cancelling the field trip (grrr Whole Foods, grrr). I now had to put together a lecture about things I don't know too much about. Fantastic.
My thoughts would be to have a simple wine tasting and history lesson with the same with chocolate. Simple. Key word. Simple. My department chair fortunately did the wine part of the lecture and I did the chocolate part. I bought several different chocolates from Whole Foods (I still love you even though you suck a little). Several hours before the class started, I get a bunch of emails and phone calls from the department manager and the chair. They reserved a large room in the dining hall and had a few plates of veggies, fruit, and cheeses ordered. Guess who had to pick them up? And guess who had to coordinate with the catering people when to pick it all up?? (Try convincing someone to work a bit later than usual...yeah.) One of the phone calls was to also inform me that they had gotten 12 bottles of wine. Mind you, my class has 25 students, not all who drink. 12 bottles. Good times for all!
The lecture came and surprisingly, it went alright. We drank half of the bottles and demolished the veggie, fruit, and cheese plates. I'd like to think it was better than what Whole Foods would have put on for us. (Maybe not completely true, but again, I'd like to think so.)
Wednesday, October 27, 2010
Oh, my...
My father sent me two gnocchi recipes. I'm quite excited to try them out (thinking this weekend). I've never actually made gnocchi before. That's right. Gasp. An Italian who hasn't tried gnocchi, yet can make fresh ravioli in her sleep. My ancestors are shamed. To right a horrible wrong, gnocchi will be made. Actually forming the little pillows are the most intimidating part. Me being part of the technology age (or at least hanging on for dear life) looked on youtube to find how to roll the little things. I have discovered in this process the gnocchi board. Yes, a board that helps you form a decorated version of the plain pillows. My grandmother would make them with a fork, but how much more fun is it to try out a new kitchen gadget!!?? Alas, I fear I will be on amazon soon to order myself one.
I have quite the weekend coming up. I must make gnocchi (the shamed ancestors and all) and do a test run of a mickey mouse cake for my friend who is throwing a baby shower. Yes, another baby shower I will stress about. I'm excited though. I even have a sketch (I can't draw) and it looks beautiful (to me). So be prepared...lots of blogging to come!
I have quite the weekend coming up. I must make gnocchi (the shamed ancestors and all) and do a test run of a mickey mouse cake for my friend who is throwing a baby shower. Yes, another baby shower I will stress about. I'm excited though. I even have a sketch (I can't draw) and it looks beautiful (to me). So be prepared...lots of blogging to come!
Saturday, October 23, 2010
Family Dinner
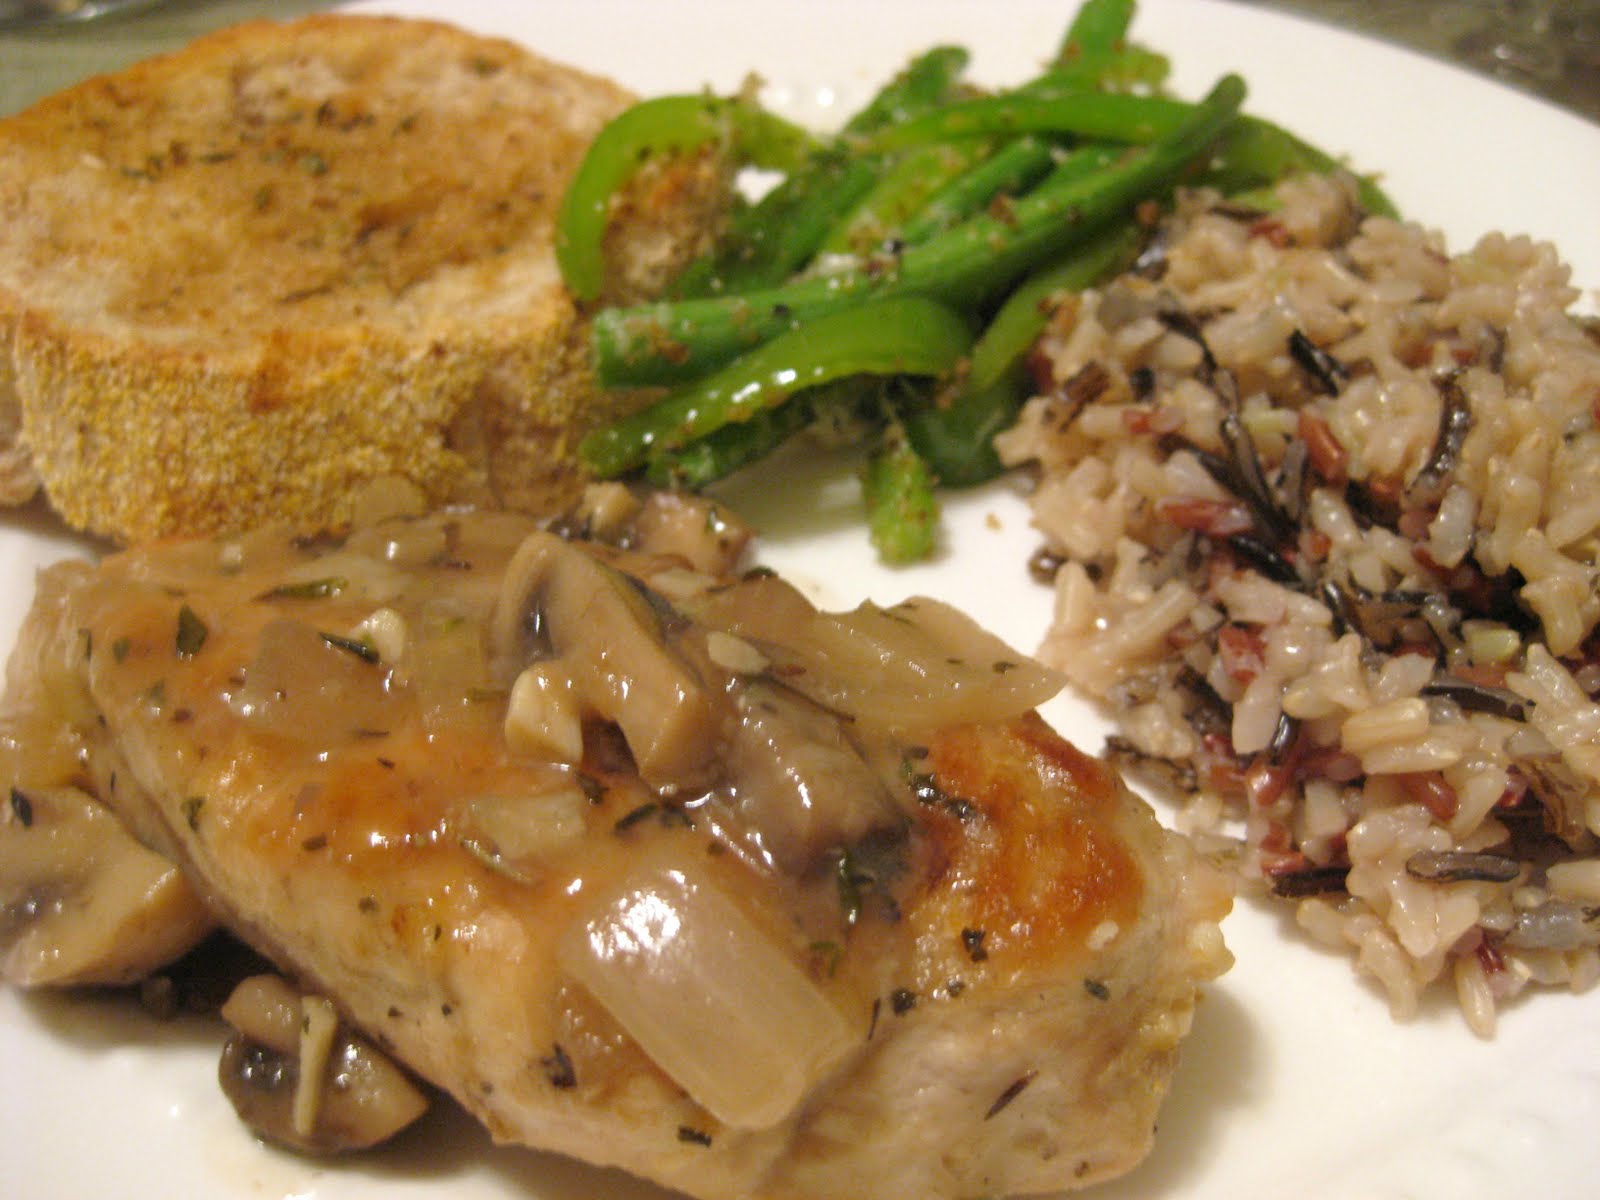
My brother and father, along with two of my friends, came to dinner last night. My dad made the request of something "light". Yeah, so that narrowed down the food choices! This was the first time in a while that I had the chance to make a nice dinner for others. I chose to make a chicken dinner with a white wine and mushroom sauce, with a side of sauteed green beans and green peppers.
Chicken with White Wine and Mushroom Sauce
1/4 cup unbleached flour
1/2 teaspoon salt
1/4 teaspoon pepper
Chicken breasts (1-2 per person)
2 tablespoons extra virgin olive oil
1 medium onion, chopped
3 cloves of garlic, minced
2 packages of fresh mushrooms (button, portabella, shiitake, etc), ends trimmed, quartered
1 cup white wine
1 cup chicken broth
1 teaspoon dried basil
1 teaspoon dried thyme
1 tablespoon flour or corn starch
In a large skillet, heat the oil. In a medium bowl, combine the flour, salt, and pepper. Add the chicken to coat and place in the skillet. Cook chicken for about five minutes on each side. Remove chicken and set aside.
Add onions, mushrooms, and garlic to the pan. Cook on low heat for four minutes (don't let the garlic burn) and stir occasionally. Return the chicken to the pan. Add wine, broth, basil, and thyme to the pan. Bring to a boil, then reduce and simmer for about 25 minutes.
Remove the chicken to a serving dish. To thicken the sauce, add the flour or corn starch. Incorporate well. Spoon over chicken and serve.
Sauteed Green Beans and Green Peppers
Handful of green beans per person, ends trimmed
One small green pepper per person, sliced
Extra virgin olive oil
1 clove garlic, minced
Bread crumbs
Parmesan cheese
Heat oil in a small skillet. Add garlic, green beans, and green peppers. Cook for about 3 minutes. Add the bread crumbs (about 3 tablespoons). Toss well and cook for another couple of minutes. Remove from heat and add the Parmesan cheese.
Thursday, October 21, 2010
English Muffins

I have my brother and father coming into town tomorrow. I'm not one to have breakfast cereals laying around the house. I think after having way, way too much of it in college, I have shunned it. (One of the reasons why you'll never find Ramin noodles in my home.) With one of them liking to sleep in and the other liking to get up before the sun rises, I thought it would be better to have something on hand. Less coordination that way. About every couple of weeks, I'll make some english muffins. They always seem to hit the spot early in the morning. Now all I have to do is figure out what in the world will I be making for dinner tomorrow.
1/4 cup warm water
1 tablespoon active dry yeast
Pinch of sugar
4 cups unbleached all-purpose flour
2 teaspoons salt
1 egg, lightly beaten, at room temperature
1 1/4 cup warm (not hot) milk
2 tablespoons unsalted melted butter
Pour the warm water in a small bow and add the yeast and sugar. Stir to dissolve and let stand at room temperature until foamy (about 10-15 minutes).
In a large bowl, mix the flour and salt. Make a well. Add the egg, milk, butter, and yeast mixture into the well. Using your hands, mix well. The dough should not be too sticky. If so, add more flour. If the dough is crumbly, add a little bit of water. Knead well for no more than 5 minutes. (Do not overknead or the muffins will be more heavy.)
Lightly grease a large bowl and place in the dough. Cover with greased plastic wrap (I normally spray it with cooking spray). Cover with a towel and let rise at room temperature until doubled in size (about an hour to and hour and a half).
Take the dough out of the bowl and lightly knead for about one minute. Roll the dough out to about 1/2 inch thick and cut rounds. (I use a drinking glass since I don't have a biscuit cutter.)
Meanwhile, preheat a large skillet to low to medium heat. Lightly grease the surface. Place the muffins on the skillet. They will get larger while cooking. Cook on each side for about 2 minutes. Be careful to keep checking the bottoms so they won't burn. Enjoy with jam (pictured with huckleberry...), cream cheese (awesome with locks and capers)...
**UPDATE** Had the muffins for breakfast Saturday morning, and both brother and dad ate several each, while commenting on how they didn't know you could make english muffins without them being Thomas English Muffins from the store!
Tuesday, October 19, 2010
Vegan Chocolate Chip Cookies
 *Warning, I am currently riding a strong caffeine buzz. I will explain shortly.
As mentioned in my first post, I compiled a "friend cookbook". I was flipping through it today and I saw a recipe for vegan chocolate chip cookies. They just sounded like they would hit the spot and the list of ingredients were rather short. Sounds perfect! I had to go by Whole Foods anyway, so I picked up some vegan chocolate chips and raw sugar. Baking a vegan recipe is rather new to me. Sure many of my recipes end up being vegan by default, but this was a first time baking without ANY animal products. I was curious about the no egg part.
There are a couple of notes to the recipe below. For the cinnamon, she says to put in a LOT of cinnamon. I believe her quote is "obscene". I put in about 2 tablespoons and they seemed about right. Any less would be odd I think. For the vegan chocolate chips, you can get them at Whole Foods - even as a Whole Foods brand, which is cheaper than normal. Also, don't use too many chips or the dough will be crumbly. Lastly, for the sugar, turbinado seems to work the best. Sucanat works as well, but it tends to suck up a lot of the moisture.
2 cups unbleached flour
2 teaspoons baking powder
1/2 teaspoon salt
Cinnamon to taste
Vegan chocolate or carob chips
1 cup raw sugar
1/2 cup canola or vegetable oil
1 teaspoon vanilla
1/4 cup water
Make sure all ingredients are room temperature. In a large bowl, mix flour, baking powder, salt, and "a ridiculous amount of cinnamon". Add chips and mix well. Make a well in the center and set aside.
In a medium sized bowl, mix the sugar and oil. Mix it well. Add vanilla and water. Mix well. Add this mixture to the flour mixture. Be careful not to overwork it. Add more chips if needed.
Spoon onto ungreased cookie sheets and bake at 375 degrees for five minutes. Flip and rotate the sheets (to make sure they are cooked evenly, in case of hot spots). Bake for another 4 minutes. The cookies aer done when they seem a little bit softer than you want them to be (they'll solidify some as they cool.)
Take them out and move to cooling racks. If they come apart as you move them, let them sit on the pan for 2 minutes.
I'm sure you all have forgotten about the caffeine buzz. Well, I made all of these cookies, so I decided to share them with my neighbors. Being neighborly and all. They invited me in to share some "bun", or coffee in Ethiopia Semitic. Homemade and very, very strong coffee. Being an ex-peace corps volunteer, I couldn't refuse. An opportunity to have cultural AND food exchange was too good to pass up. (Plus, wouldn't I have insulted them to refuse??) It was delicious (saying a lot since I don't actually drink coffee). It may have had something to do with two spoons of sugar, but we'll go with the coffee. Since that was at about 8:00 and I'm still shaking (it's after 10), I think I'm in for a long night. I did enjoy sharing food and culture with my neighbors, as it was the first time we've all really talked. We even watched an Eritrean movie together (they are from Eritrea), one that I couldn't understand, but that's the beauty of acting. Actions speak louder than words. (It did help when they translated some so I didn't get completely lost.) Very sad movie, but again, great experience!
P.S. Discovered a new setting on my camera, well new to me, hense the cool cookie picture above. Pictures will improve, I promise!
Subscribe to:
Posts (Atom)